Raspberry Pi
01 April 2013
I received my Raspberry Pi five days ago and it’s fun to play with. Normally I do stuff in the browser pushing pixels using CSS and Javascript and don’t care about all the things that happen inside the machine I’m sitting infront of. But from time to time, I like to dip my toes in the hardware world and try to build “real” things instead of just doing software. It’s nice to fiddle with CSS and see the result on the screen, but it’s amazing if you write code, put it on a small computer, and see it work. Even if it’s just lighting a small LED you wired to it.
I had played with an Arduino before and it was awesome, building my own little WordClock (not finished). Building it with HTML/CSS/Javascript was awesome, but soldering it by hand and see it become real is a whole other story. The amazing thing is that I had never soldered before and was able to build up a 11x10 matrix with more than 110 solder joints and connect everything to an Ardunio.
But back to the topic. I know that with the Raspberry Pi it’s not quite like with an Arduino. The Raspberry is a whole computer by itself and therefore, you don’t have to build everything from ground up, but nevertheless, I like to play with it and learn new stuff.
Running Raspbian “wheezy”
To get started I went to the offical download page and downloaded the “Beginner” OS called “wheezy”.
While it was downloading, I prepared my SD card - formating it to FAT using Disk Utility. After the download finished, I had no idea on how to write it to the SD card, but I figured it out quite fast. There are plenty of tutorials for OS X. This one I found to be the best.
Booting for the first time
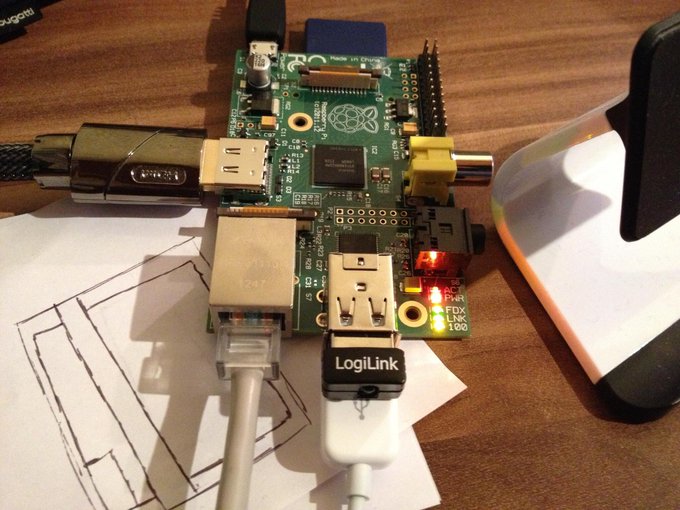
I want to boot it, now! But clever as I am, I have totally forgotten to order a USB to microUSB - B cable. Luckily, after searching for quite a while, I found one. Phew, so I can test it right away. All other cables where connected quickly and it worked right away. It’s cool to see it in action pushing pixels on a Full-HD Monitor.
WiFi needs power
I want to connect my Raspberry Pi to my local Network using WiFi, to place it anywhere I want. I connected the WiFi adapter I bought with my Raspberry PI following this guide. But it did not work. After following nearly every tutorial on the Internet on how to get WiFi to work and editing various files for like three hours, I came to the conclusion that it must be power related and I have to buy a powered USB hub. No guide I found on the internet mentioned that, but there is an easy way to test if your WiFi adapter is underpowered. First list all USB Devices using lsusb. You will get something like this:
  Bus 001 Device 002: ID 0424:9512 Standard Microsystems Corp.
  Bus 001 Device 001: ID 1d6b:0002 Linux Foundation 2.0 root hub
  Bus 001 Device 003: ID 0424:ec00 Standard Microsystems Corp.
  Bus 001 Device 004: ID 05e3:0608 Genesys Logic, Inc. USB-2.0 4-Port HUB
  Bus 001 Device 005: ID 0bda:8176 Realtek Semiconductor Corp. RTL8188CUS 802.11n WLAN Adapter
Search for one of the Keywords “WLAN”, “WiFi” or “Wireless” in the output of lsusb. If you find something, then the adapter was recognised by the system correctly, if not, check the connection. For me, the last line shows my WiFi adapter.
The only problem is that the adapter might be recognised by the system, but not get enough power to connect to a router. To verify it gets enough power, we first need to know to which network interface your WiFi adapter got bound by the system using ifconfig:
    eth0      Link encap:Ethernet  HWaddr cc:cc:cc:cc:cc:cc
              [...]

    lo        Link encap:Local Loopback
              [...]

    wlan0     Link encap:Ethernet  HWaddr xx:xx:xx:xx:xx:xx
              [...]
There is an interface called wlan0. To verify the adapter is getting enough power, we than scan for available networks using iwlist wlan0 scan - you might need to install wireless-tools using sudo apt-get install wireless-tools. If you don’t see any results, the adapter is probably underpowered.
Using a powered USB hub
A powered USB hub is great. It can power multiple USB peripherals and, as a bonus, it can power your Raspberry Pi too. Just power up the USB hub and connect one of its USB outlets to the MiniUSB B port of your Raspberry Pi. Then You just have to connect one of the Raspberry USB ports with the USB hub inlet (Most likely to be a USB B port). This will cost you at least one port on your USB hub, so be sure you got enough outlets there. You should also keep in mind not to buy the cheapest USB hub, cheap models can damage your Raspberry by causing electrical backflow to it. Additionally, you should ensure that the DC connector has at least 1500mA, or even better 2000mA, to power both the peripherals and the Raspberry Pi.
Building a Media Center
I chose to run Raspbmc and I don’t regret it. The installation was very comfortable. They have an install script on there site which does all the heavy lifting for you, they even ask if you would like to pre-configure WiFi. After installing it on your SD card, you’ll boot up into another installer which will automaticlly install the newest build available to your Raspberry Pi. I can’t recommend it enough.
But once again, the WiFi didin’t work out of the box. It was not that much of an issue, after booting into XBMC, just install the Network Manager and you are good to go. At least that was the case for me.
You now have a full installation of XBMC running on your Raspberry Pi, ready to connect your external hard drive and organize your movies, shows and music.
After configuring my media sources and activating AirPlay, I tried to stream some music to the Raspberry Pi using my iPhone, but there was no sound at all.
Checking the settings showed that I had correctly chosen HDMI as my primary audio output. To verifiy that AirPlay was working correctly and my Raspberry Pi was receiving audio, I changed the settings to analog output and connected some headphones to the analog jack on the Raspberry Pi. That worked! So, there must be an issue with the HDMI audio.
HDMI and Audio
I searched for help and found this post which solved my problem nicely.
Using ssh to connect to the Raspberry was no problem at all. SSH comes preconfigured with raspbmc, but you should change the default password, or even better use SSH keys. If you are using Github you know how to do it.
Connected to my Raspberry Pi, I then added these flags:
    # Set monitor mode to CEA
    hdmi_group=1
    # Force the monitor to HDMI mode so that sound will be sent over HDMI cable
    hdmi_drive=2
to my /boot/config.txt using sudo nano /boot/config.txt and rebooted my Raspberry Pi with sudo reboot. Now sound was working for me.
(More information about these flags can be found here)
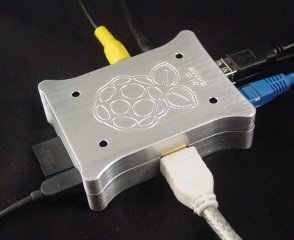
My Case
I know that you can buy many diffrent cases for the Raspberry Pi, but I want to include the USB hub with it. I found various cases online, including a Lego Case.
Thanks to @AnnikaFeiling, I know have this awesome Lego case:
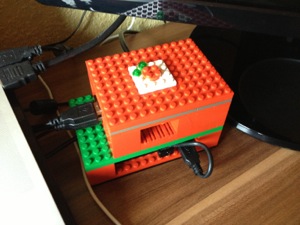
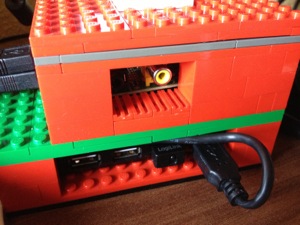
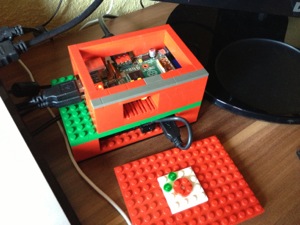
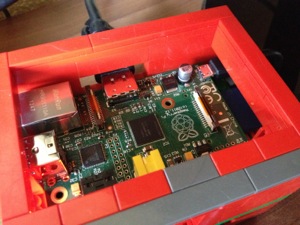
(You can see the images in a higher resolution here)
Final words
I learned quite a lot during the past few days playing with the Reaspberry Pi. It’s a great little Computer with everything you need to build a basic media center. The next few weeks I will be back to Software looking into AngularJS to build my own little WebApp to control XMBC. I know that AngularJS is a little overpowered, but I’ve been wanting to look into it for a long time now, and in order to get started, I need to build something.
Thanks for reading. If you have any questions or corrections just contact me on Twitter.